

So, you've purchased advertising with Adelaide Fringe and now you're ready to upload your artwork, but you're not quite sure where to start? Don't stress! This guide will walk you through the process step-by-step, making it easy to get your fantastic show seen by everyone.
Contents
- Why advertise with Adelaide Fringe?
- Step-by-Step Guide to Uploading Artwork
- Summary
- Additional Resources
Why advertise with Adelaide Fringe?
Placing an ad with us means you can get your show in front of a massive audience of highly motivated ticket buyers. Whether you want to be seen in the printed guide, on our website and app, or on our social media channels, we have a solution for you. We can help you reach audiences by genre, location, and even previous booking history, which is a great way to target people you know are keen to see a show like yours. This is a brilliant option if you're time-poor or don't have the marketing knowledge to run your own ad campaign.
Check out our Advertising Packages
Step-by-Step Guide to Uploading Artwork
Follow these simple steps to successfully upload your advertising artwork for your Adelaide Fringe show.
Open 'My Advertising'
First, navigate to your Adelaide Fringe Artist and Venue Registry (AVR) account and open the 'My Advertising' section. This is where you'll see all your purchased advertising products.

Click on the Purchased Item
Click the link corresponding to the advertising product you wish to manage. This will open the option to upload your artwork.
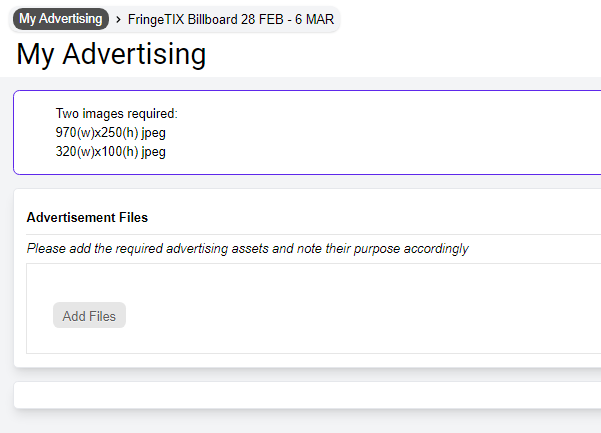
Add Your Files
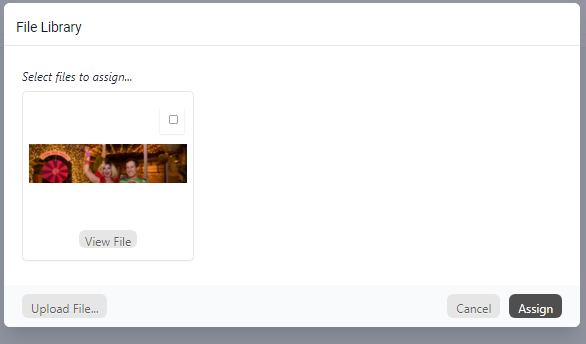
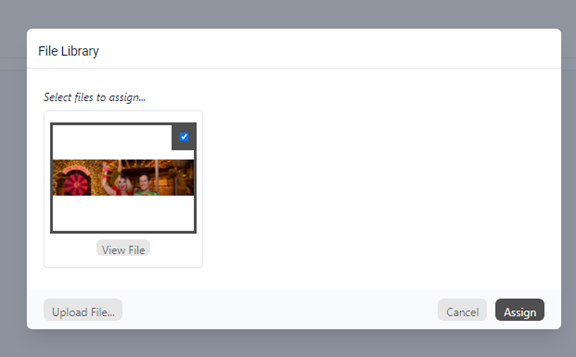
Click 'Add Files' to open the upload dialogue box. If you've previously uploaded files, they will appear here. To upload a new image, click 'Upload file'. Once uploaded, check the top right box on the image and then click 'Assign'.
Confirm Assignment
Once your file is assigned, a confirmation box will appear.
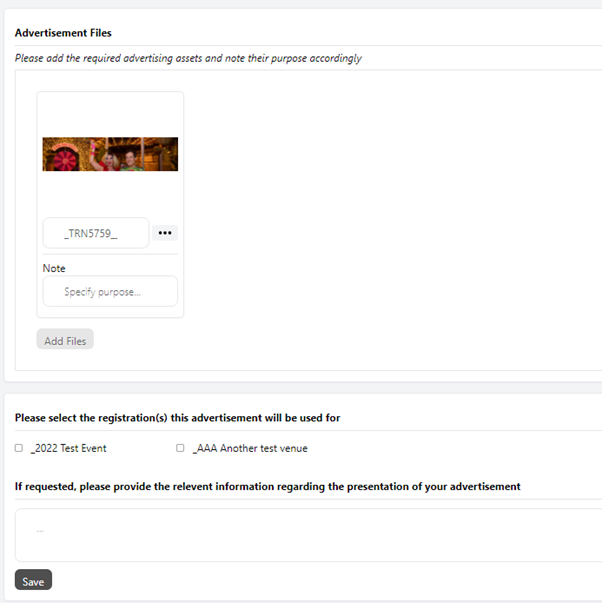
Assign to Your Show
It's crucial to click on the specific show that this advertising will apply to. This is especially important for artists and producers managing multiple shows, ensuring the correct ad product is linked to the right show.
The section titled 'If requested, please provide the relevant information...' is where you should input any accompanying copy for your ad. This might include details for a giveaway, a show description, or any other relevant text.

Save Your Changes
Once you've completed all the steps, remember to SAVE your work. A pop-up will confirm that your changes have been saved, but the page won't automatically advance. You'll need to navigate back through the Menu to return to 'My Advertising' to confirm that your artwork has been successfully uploaded and is displaying correctly.
When everything is set up, your item should look like this:

Always double-check the file specifications provided in the Advertising Packages Kit or the AVR product listing. This ensures your artwork meets all requirements and can be processed by your content deadline.
Summary
- Access your purchased advertising products via 'My Advertising' on AVR.
- Upload your artwork files and assign them to the correct advertising product.
- Link the advertising product to your specific show, especially if you have multiple shows.
- Add any necessary copy or details for your advertisement in the designated section.
- Save your changes and verify the upload in 'My Advertising'.
Additional Resources
- Adelaide Fringe Advertising Packages Kit
- Contact the Ads Team: ads@adelaidefringe.com.au