

Curious about how many folks will be gracing your venue or event come Fringe time? This guide is your handy companion for navigating Manage My Tix, helping you effortlessly check customer door lists and keep tabs on important daily updates, like accessibility requirements.
Contents
- Logging In
- Creating a New Report
- Choosing Your Report Type
- Setting Report Criteria
- Performance-Specific Door Lists
- Event-Specific Door Lists
- Saving and Scheduling Reports
- Understanding Your Door List with Access Requirements
- Setting Up Your Venue Box Office/Door Admittance
- Important Things to Note
- Need a Hand? Get Support
Logging In
First things first, you'll need to log into the Manage My Tix Portal. You can find your login details on your My Festival dashboard within AVR.
Your Username will be your Organisation (ORG) code (e.g., ORG1234), and your Password will be the email address you used for registration (e.g., myemail@email.com.au). If you're having any trouble getting in or can't find your details, just send an email to ticketing@adelaidefringe.com.au.
Once you've successfully logged in, you'll see two options on the left side of your screen: Reports and Ticket Management. To check who's coming to your shows, you'll want to select Reports.

Creating a New Report
After clicking on Reports, a drop-down menu will appear with three choices:
- Saved reports
- New reports
- Schedule saved reports
To start fresh, click on New report.

Once you're on the New report dashboard, you'll have two steps to complete to set up your report.

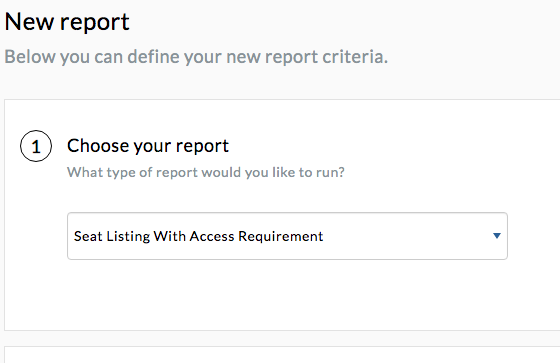
Choosing Your Report Type
In this section, you can pinpoint the exact report you need to run. For your door list, select the report titled 'Seat Listing With Access Requirement'.
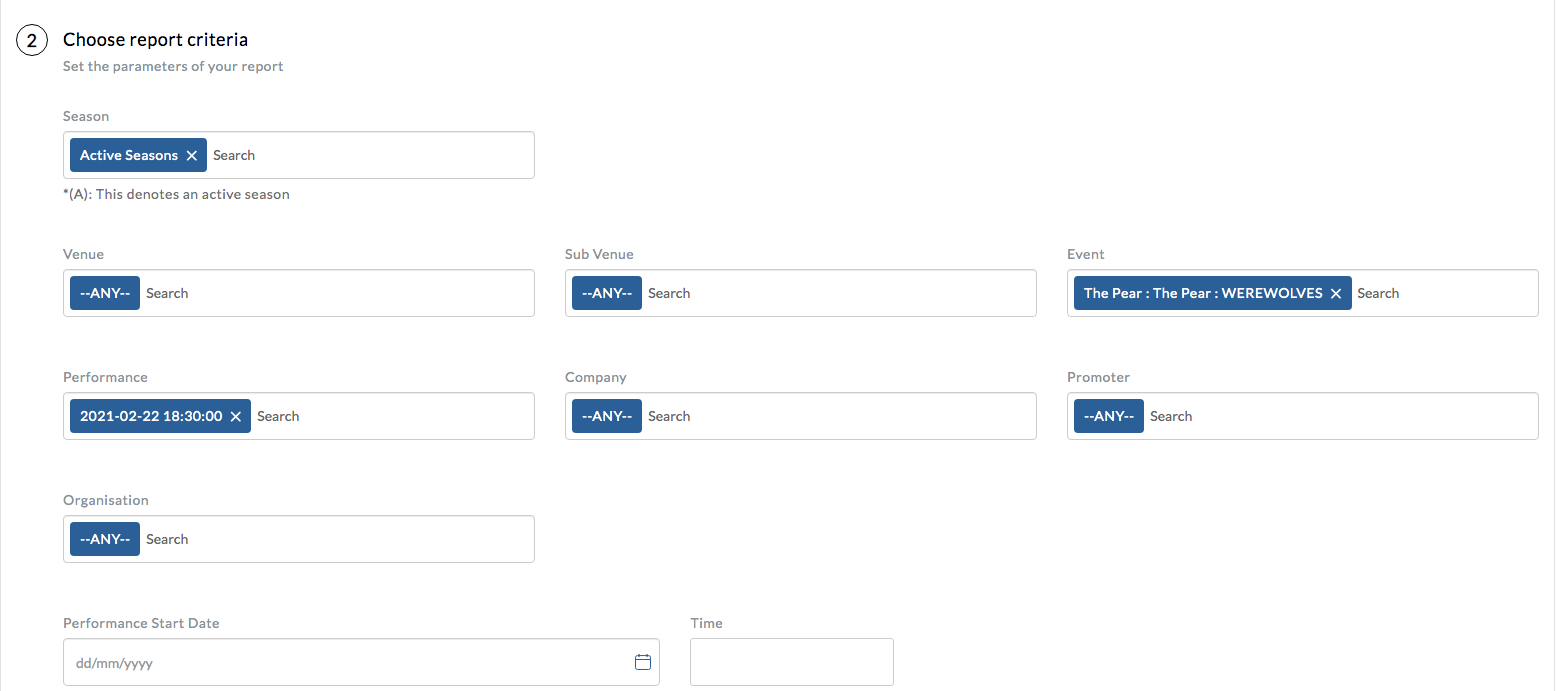
Setting Report Criteria
Once you've chosen your report type, the report parameters will pop up. It's really important to remember that you can generate different door lists depending on how many parameters you choose to apply.
Performance-Specific Door Lists
One super useful feature in Manage My Tix is the ability to create a report tailored precisely to your needs. To pull a report for a specific performance, follow these parameters:
- Season: Leave this as Active Season.
- Venue and Subvenue: Leave this as --ANY--.
- Event: Search or type in your event name. If your event is presented in multiple venues, you'll then be able to select the specific location.
- Performance: Select the exact date and time for the performance you need. You can select more than one performance here. If you want the report for an entire season, leave this as --ANY--.
- Promoter/Company/Organisation: Leave this as --ANY--.
Leave all other fields as they are, scroll right to the bottom, and click Generate Report.
Event-Specific Door Lists
If you're looking to generate a report for a full season of your event, use these parameters:
- Season: Leave this as Active Seasons.
- Event: Search or type in your event name. Again, if it's in multiple venues, you can select the specific location.
- Performance: Leave this as --ANY--.
- Promoter/Company/Organisation: Leave this as --ANY--.
You have a few options for downloading and viewing your report. We commonly use the PDF version, but it's often handy to download it as a CSV file if you want to sort the data or rearrange columns in Excel.
Keep scrolling down for instructions on how to effectively use your report to admit patrons to your venue or event.
Saving and Scheduling Reports
Once you've chosen your desired parameters for your Seat Listing, click Save for later.
You'll then be prompted to give your report a name. We suggest including the report type in the name for easy identification. After typing a name, click save report.
Now that you've created and saved a report, it will appear in your Saved reports dashboard. From here, you can easily download, edit, or delete your reports whenever you need to.

Scheduling Saved Reports
If you'd like your reports to be automatically generated and emailed to you on a regular basis, you can schedule them through Manage My Tix. To do this, first click Schedule saved reports from the options in the left sidebar. Once you're on the scheduling dashboard, follow these steps:
1. Click New Schedule

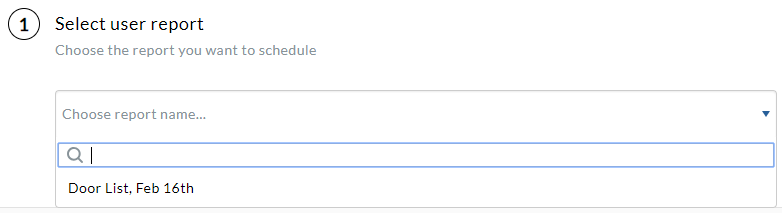
2. Select User Report
All of your saved reports will appear in this handy drop-down menu.
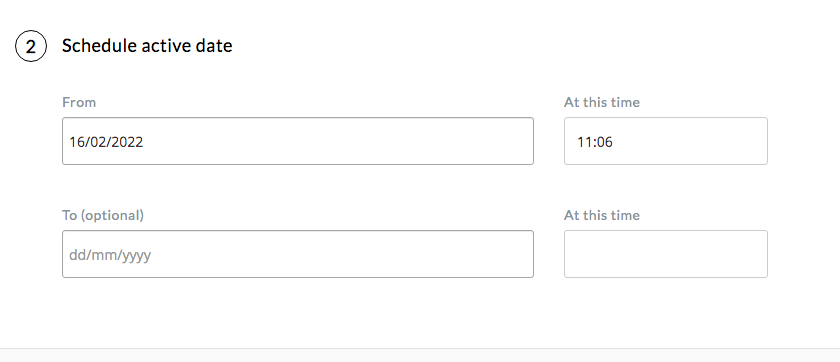
3. Schedule Active Report
This is where you choose the time you want the report to start running from. You can set it for today or schedule it for a future date.
4. Schedule Runtime
This setting determines when the report will be sent. For example:
- If you want it sent once a day at 5 pm, set the Start runtime as 17:00 and the Run Time Interval as Daily.
- If you need it sent every hour between 9 am and 5 pm, set the Start runtime as 09:00, the End runtime as 17:00, and the Run Time Interval as 1 hour.
- You can have your reports sent hourly, daily, weekly, or whatever suits your purposes best. Feel free to experiment a bit to find what works for you!

5. Send to
Enter the email addresses of the recipients who should receive this scheduled report. If you have multiple recipients, just separate their email addresses with a semicolon.
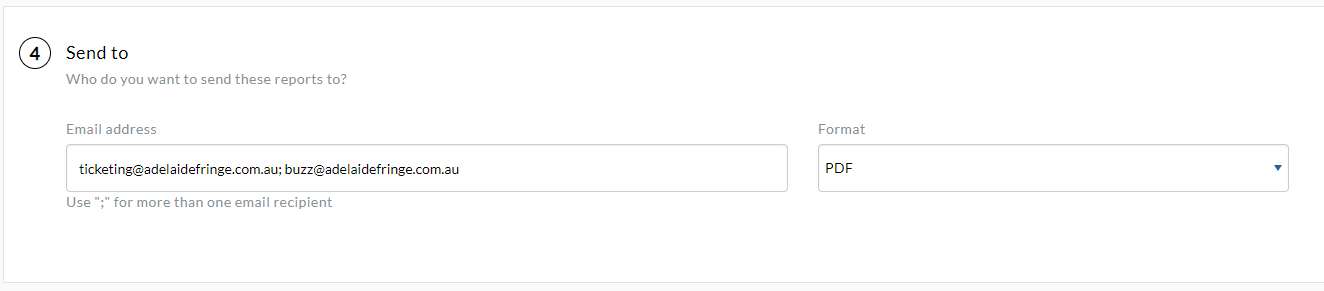
Once you're happy with your selections, click Add schedule.
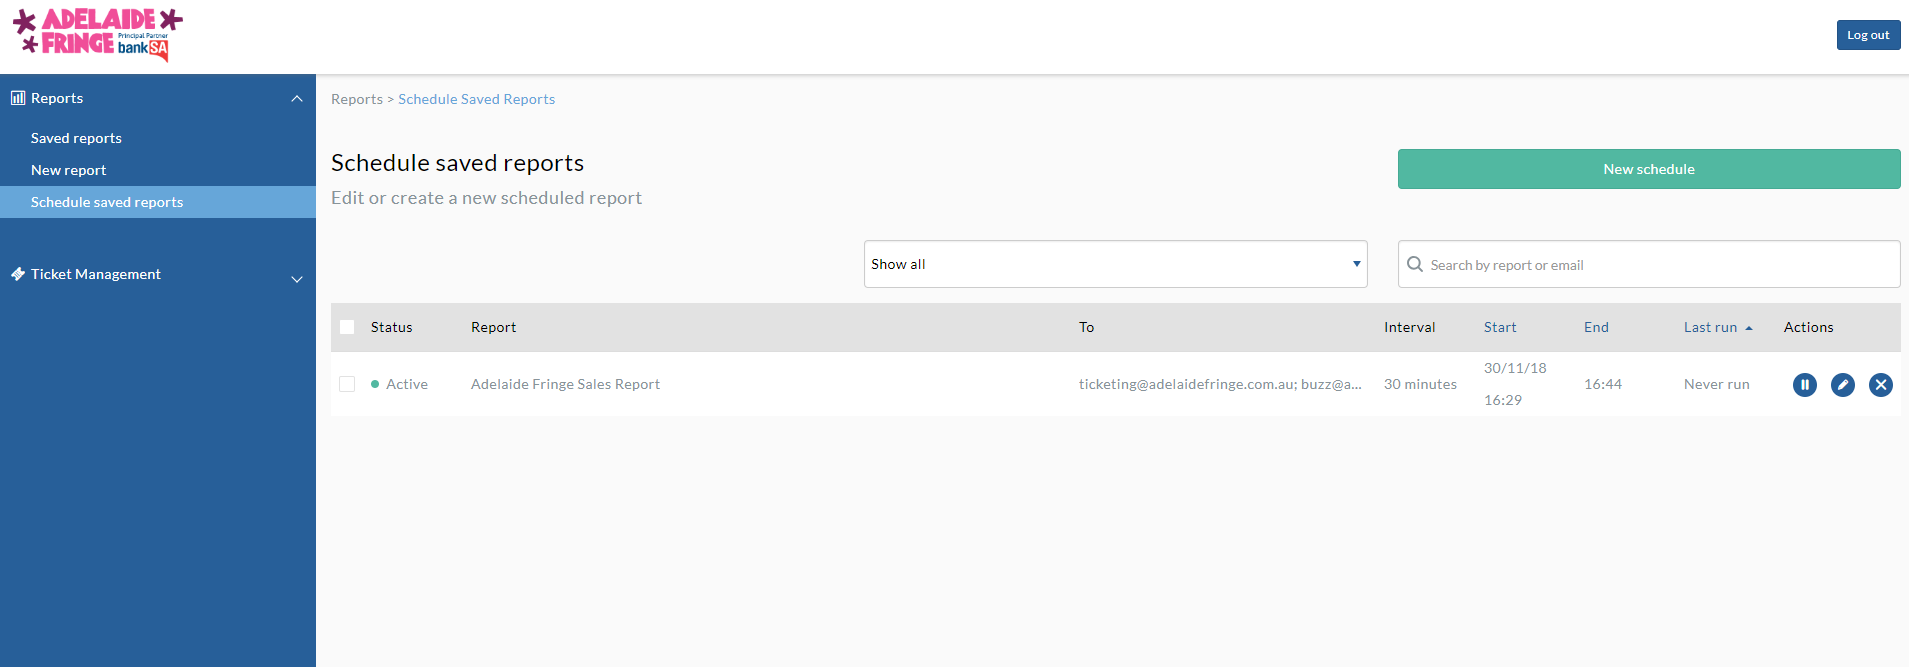
Your newly created scheduled report will now show up on your Schedule saved reports dashboard. From here, you can easily pause, edit, or delete any scheduled report.
Understanding Your Door List with Access Requirements
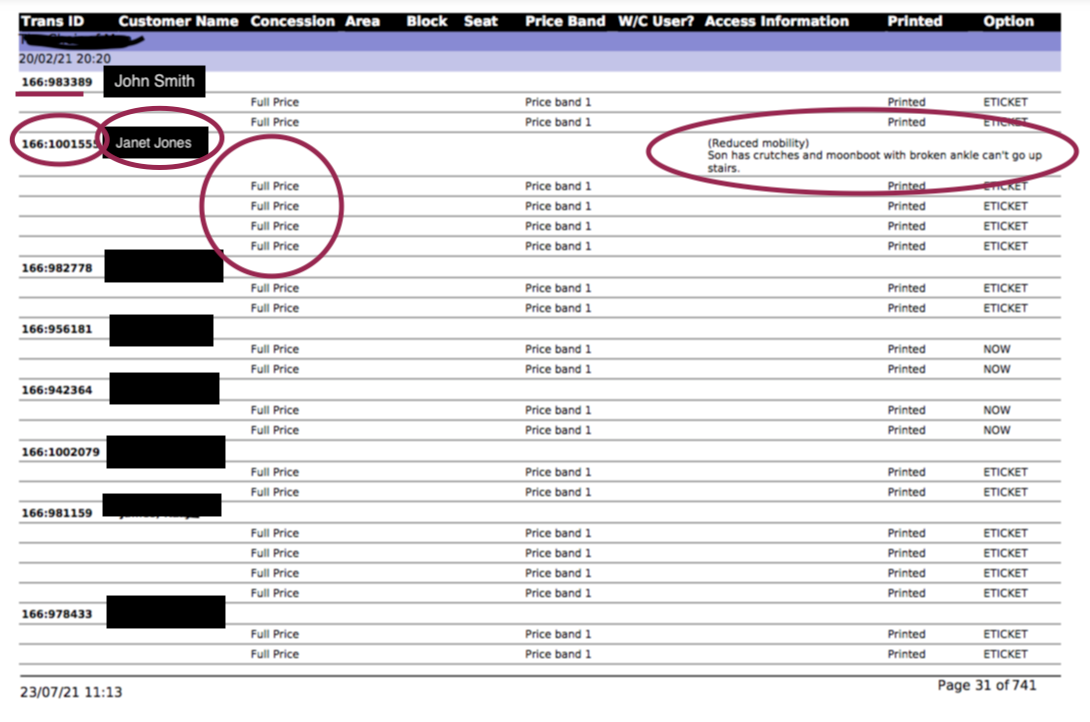
The Seat Listing with Access Requirement report provides you with crucial details for admitting patrons:
- Transaction ID: This is the customer's unique ticket number.
- Customer Name: This indicates the patron who purchased the tickets. For example, if Janet Jones purchased 4 x Full Price Tickets, her name will appear with that count.
- Access Information: This column is really important to check. It will let you know if you need to make adjustments, such as moving chairs for wheelchair patrons or if any attendees require additional assistance.
You can check people off your Seat Listing with Access Requirement report as they enter your venue or event space. Another option for admitting patrons is by using e-ticketing scanning technology. For more information on using a scanner, you can email ticketing@adelaidefringe.com.au.
Setting Up Your Venue Box Office/Door Admittance
To ensure a smooth entry process for your patrons, here are a few things to consider for your venue's box office or door admittance procedure:
- Before the Fringe even begins, you'll need to be clear about who is responsible for admitting patrons to events at your venue. Will the venue staff handle this, or will your artist team be managing it?
- You'll need access to a computer on-site at your venue so you can download the Seat Listing with Access Requirement report for each event right before the show starts. You can either print the door list if you have the facilities, or use a tablet to have the list live as patrons walk in.
- Remember, patrons can purchase tickets online right up until the event's start time, so your list might update last minute!
Important Things to Note
All ticket holders for an event will appear on the 'Seat Listing with Access Requirement' report. If a customer isn't showing up on your list, it could mean a few things:
- They might have purchased tickets since you last downloaded or updated your list.
- Their ticket purchase might not have gone through successfully.
- They could be attending on the wrong night.
- They might be at the wrong venue or event altogether.
Summary
- Manage My Tix is your key tool for accessing door lists and customer details.
- You can generate both performance-specific and event-specific door lists tailored to your needs.
- Save and schedule reports to receive regular, automated updates directly to your inbox.
- Always check the Access Information on your door list to ensure you're ready to accommodate all patrons.
Additional Resources
- Manage My Tix Portal
- Contact the Ticketing Team: ticketing@adelaidefringe.com.au | 08 8100 2012
- Adelaide Fringe Ticketing Resources